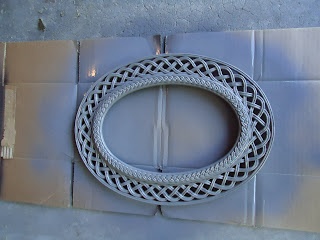
Today I'd love to show you my newest creation--I made a cork board from an old picture frame! I literally just finished this one before logging on to my computer to download the pictures and put up a new post. I'm so excited for you guys to see this one!
HOW TO MAKE AN OLD FRAME INTO A NEW CORK BOARD
Here we go!
STEP 1: Find an ugly, old frame. I found this one at our local DI. (That's the local thrift store for those of you who aren't from/don't live in Utah/Idaho) It cost me a grand total of 75 cents. I knew it had potential when I first bought it, but I didn't know what I wanted to do with it. After sitting in a pile of other old frames at our house (my mom collects old frames she can ModPodge for quick gifts) for over a year, I finally came up with the idea of making a cork board!
 |
| What a gem of a portrait! |
 |
| It already looks better! |
 STEP 3: Spray paint! A good coat of paint can change the world...or at least make it a color you like. My Aunt Shauna left my mom some old spray paint when her family moved to Washington, and she had this really awesome shade of gray that I LOVE.
STEP 4: Get some cork board. I bought a roll at Hobby Lobby for $4.99 and used the backing of the frame and the glass to trace two oval shapes into the cork board. Then, I cut out the cork with a razorblade, but if it's thin enough cork, you could probably get away with a pair of scissors. The reason I used two pieces of cork is because it is really thin and I wanted there to be enough cork to stick a thumbtack into it if I wanted.
 |
| I guess there is a use for that 300 bucks after all! |
My cork board was curling up on itself, so I spritzed some water on the pieces, layered them between the backing and the glass, and put some of my old text books on top of them to flatten them out.
After a couple days, they were all flat and ready to go!
STEP 5: (OPTIONAL) Paint a pattern on the cork board. I used an awesome Martha Stewart stencil that has a bunch of cute patterns on it. I tested it out onto the smaller piece to make sure I liked it before painting the piece of cork that will face outward.
STEP 6: Put the cork into the frame, along with the frame backing. Easy peasy!
STEP 7: Put it up in your house an enjoy!
TA DA!!
It's really pretty easy, and I love it! If you guys make your own versions, I would love to see them! Post a link in the comments if you do, and have a great day you guys!!


No comments:
Post a Comment